November Feature Updates Are Here!
This update brings 24 new features across four major modules, including AI Layout and Whole-Home Customization! Through continuous product development and upgrades, we’re committed to delivering a better experience for designers.
Take a look—maybe your favorite feature is here!
01 | General Operations
- Upgraded Measuring Tool – Element Measurement
- Upgraded Measuring Tool – Precision Measurement
- 2D Mode Now Supports Style Rendering
- Added Skybox for Enhanced Visualization
- Lock Camera Rotation for Stability
- Reset Roaming View: Z-axis Adjusted to 90 Degrees
- Select Camera View: Directly Face the Wall
- Project Sorting in "My Designs" Now Saves Your Preference
- Optimized 2D View Styles for Better Clarity
02 | Whole-Home Customization
- Panel Editing: Display & Edit Distance to Left/Right Edge for Cutouts & Milling
- Custom Cabinet Measurement: Added Customizable Hotkey for Panel Distance
- Material Management: Modular Display for Custom Cabinets
- Integrated Handleless Design into a Unified Entry
- Order Cart: Product Names Now Support Chinese & English Brackets Output
- Hardware Hole Position: Option to Set Distance from Panel Edge (Only available in AiHouse Advanced)
03 | Aluminum Doors & Windows
- Series Replacement & Refresh Feature for Easy Updates
- 2D App Now Includes a Dedicated Door & Window Library
- Optimized Positioning of Sliding Panels for Three-Track Sliding Windows
04 | AI Layout
- Kitchen Layout Scoring System for Optimized Design
- Supports Layout Zoning & Open Kitchen Arrangements
- Enhanced Bedroom Layout Optimization
- New Measuring Tool for More Accurate Layout Planning
- Bathroom Layout Scoring System for Better Space Utilization
- Improved 3D Preview for More Realistic Visuals
01 | General Operations Updates
1. Enhanced Measuring Tool – Element Measurement
Key Benefits:
-
Supports measurement between selected elements and any other object in 2D, 3D, and Roaming mode.
-
Default shortcut: F5
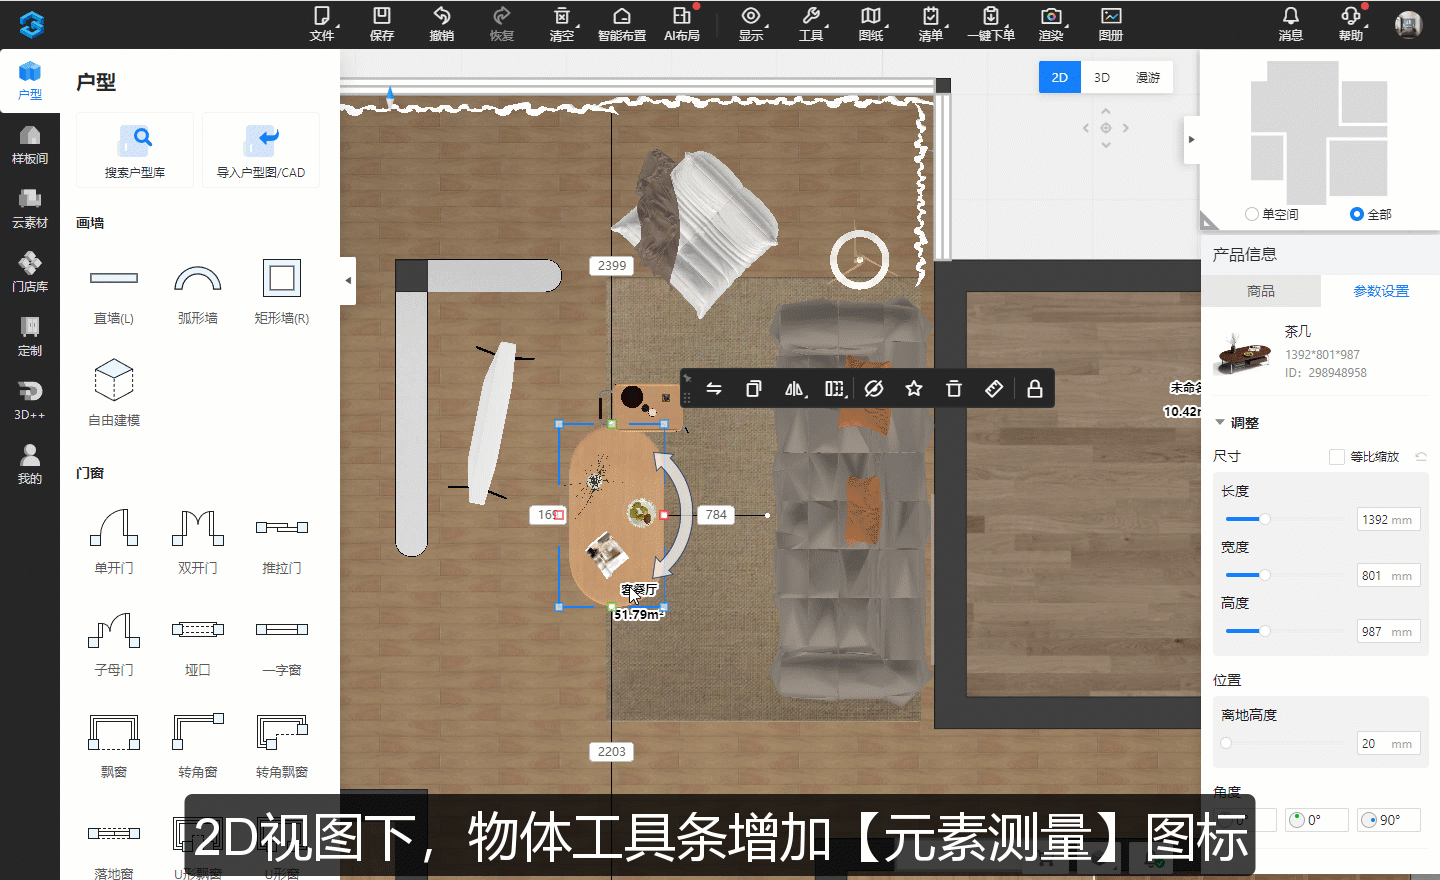
How It Works:
-
A new "Element Measurement" icon has been added to the object toolbar.
-
After selecting an object, you can measure its distance from various elements, including:
-
Finished assets, doors & windows, custom doors & windows, walls, feature walls, beams & columns, platforms, niches, tiled surfaces, ceiling & wall panels, custom cabinets, and SU-modeled objects.
-
-
When adjusting the ruler, only the first measured object can be moved, and only finished assets are adjustable.
2. Enhanced Measuring Tool – Precision Measurement
Key Benefits:
-
Supports measuring any two points in 2D, 3D, and Roaming mode.
-
Default shortcut: F6
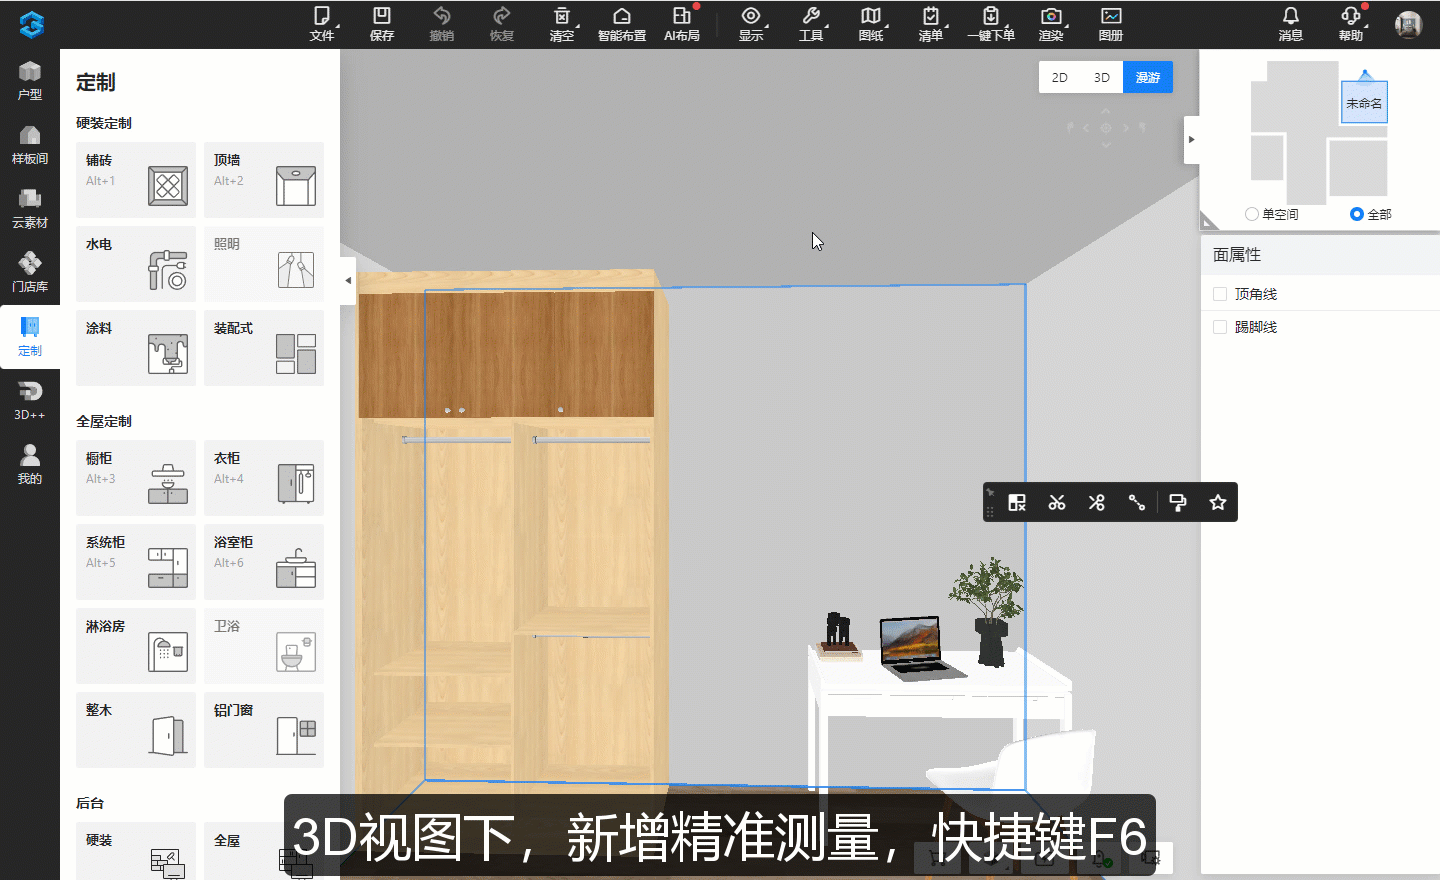
How It Works:
-
When hovering over points, lines, or surfaces, a highlight overlay appears.
-
Click to select any two points, lines, or surfaces for measurement, even across different modules.
-
Entry: Top menu → Tools → Distance Ruler or shortcut F6.
-
Measurement supports multiple object types:
-
Finished assets, finished doors & windows, custom doors & windows, walls, feature walls, beams & columns, platforms, niches, tiled surfaces, ceiling & wall panels, custom cabinets, and SU-modeled objects.
-
-
When adjusting the ruler, only the first measured object can be moved (finished assets only).
-
In 2D mode, when entering Precision Measurement Mode, walls will no longer display window cutouts.
3. Style Rendering Mode Now Available in 2D View
Key Benefits:
-
Enables Style Rendering Mode in 2D view, making the design process more engaging.
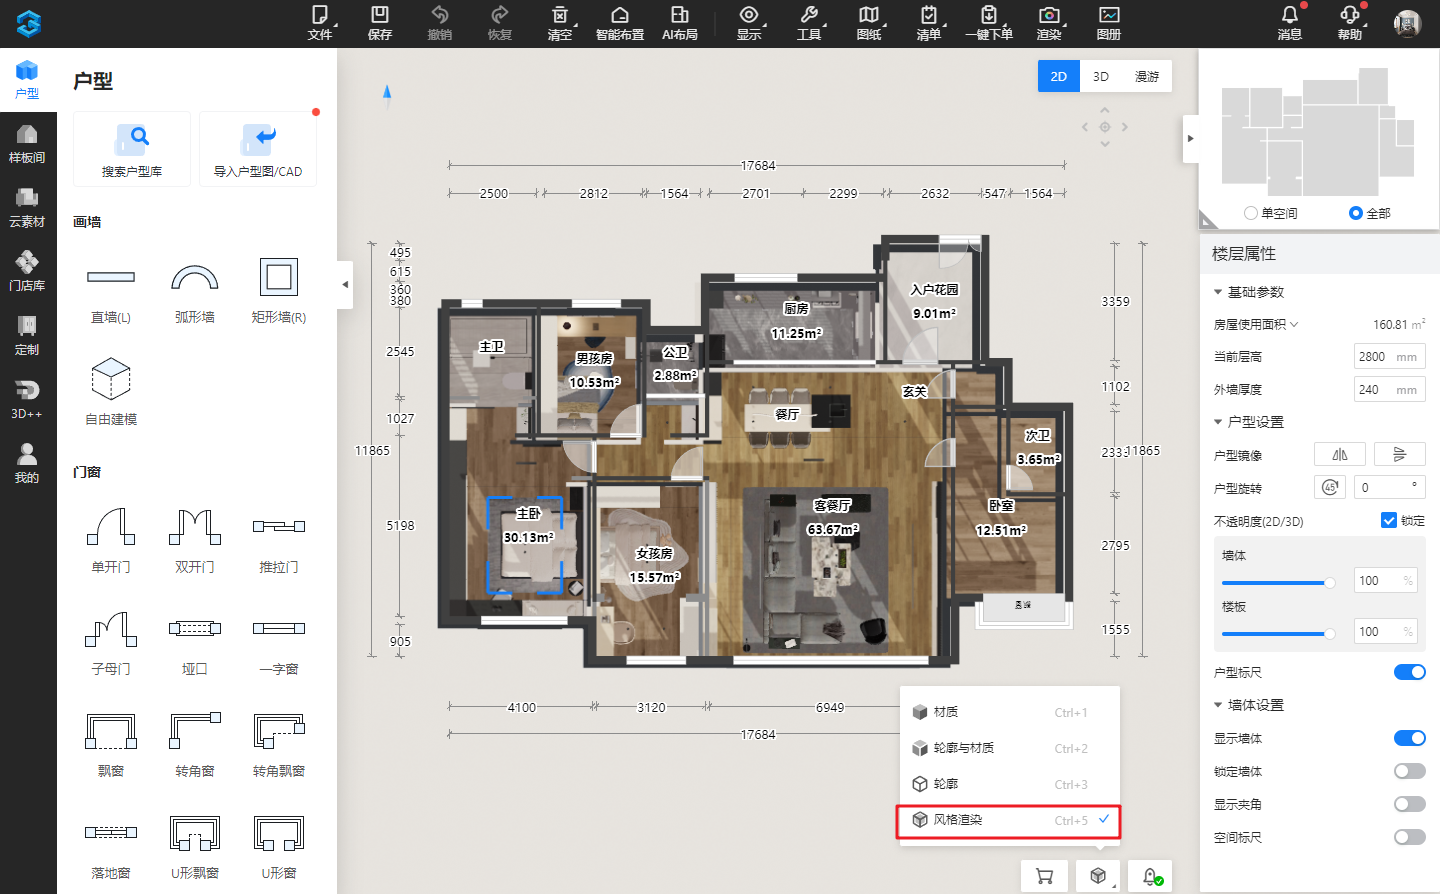
How It Works:
-
Entry: Bottom interface → Click "Display Style".
-
Select "Style Rendering" mode.
4. New Skybox Feature for Enhanced Visualization
Key Benefits:
-
Added four new skyboxes:
-
Blue & White, Light Yellow & Blue, Gray, and Dark Mode.
-
-
Improves aesthetics and reduces visual fatigue.
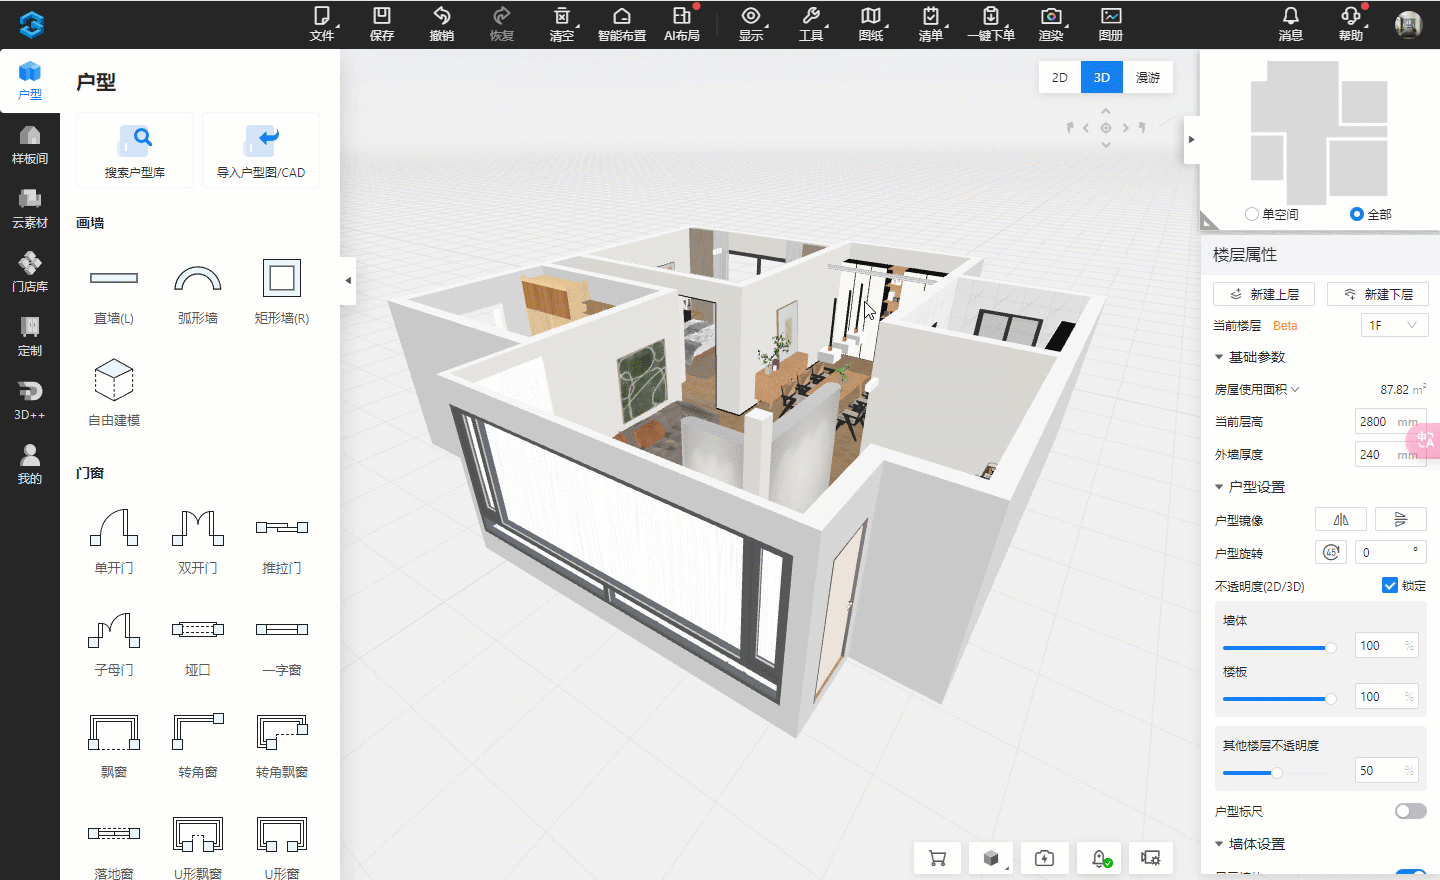
How It Works:
-
Entry: Top menu → Tools → Settings → User Preferences.
-
Select Skybox Background, close the pop-up window to apply.
5. Lock Camera Rotation
Key Benefits:
-
Prevents accidental camera rotation during design work.
-
Keeps the view stable and aligned.
How It Works:
-
In the Camera Settings Panel, a new "Lock Camera Rotation" option has been added.
-
Default: Off
-
When enabled, the camera view cannot rotate in 3D or Roaming mode.
-
-
Lock settings will not be saved when saving a project.
-
Clicking "Reset" will restore the default (Lock Camera Rotation = Off).
6. Reset Roaming View – Adjust Z-Axis to 90°
Key Benefits:
-
Resets Roaming Mode view to a 90° Z-axis (instead of 45°), making adjustments easier.
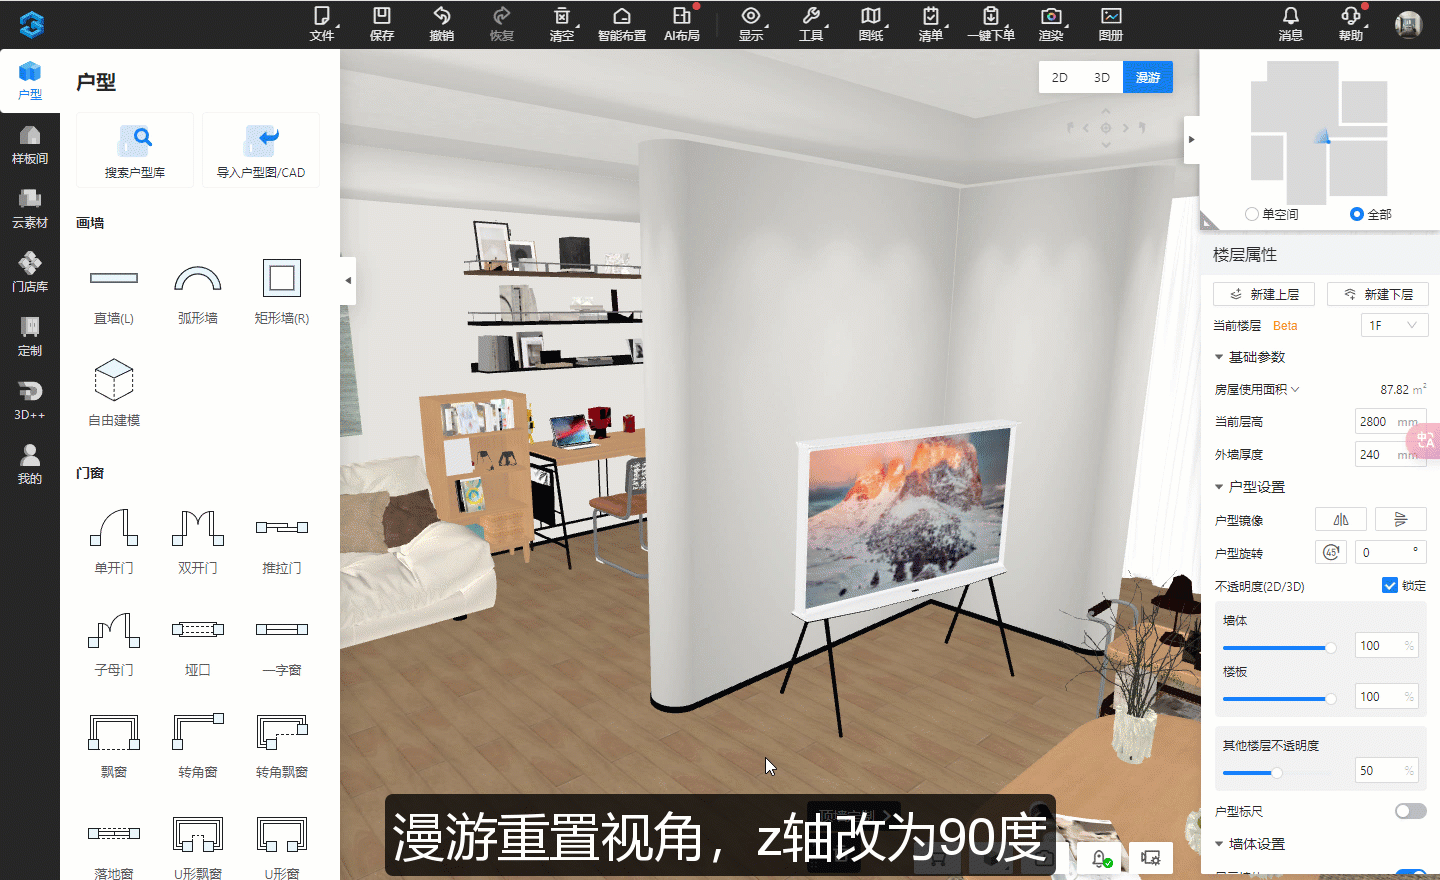
How It Works:
-
In Roaming Mode, click "Reset View", and the Z-axis will adjust to 90°.
-
The 3D view remains at 45° as default.
7. Quick Camera View Reset – Face the Selected Wall
Key Benefits:
-
Allows quick camera alignment to directly face a selected wall.
How It Works:
-
Applies to 3D and Roaming Mode.
-
Hover over a wall in the Navigation Map – a triangle icon will appear.
-
The triangle indicates the camera facing direction. Click to confirm, and the camera will align to face the wall.
8. Custom Sorting for "My Projects"
Key Benefits:
-
Users can customize the sorting order of their project list for better organization.
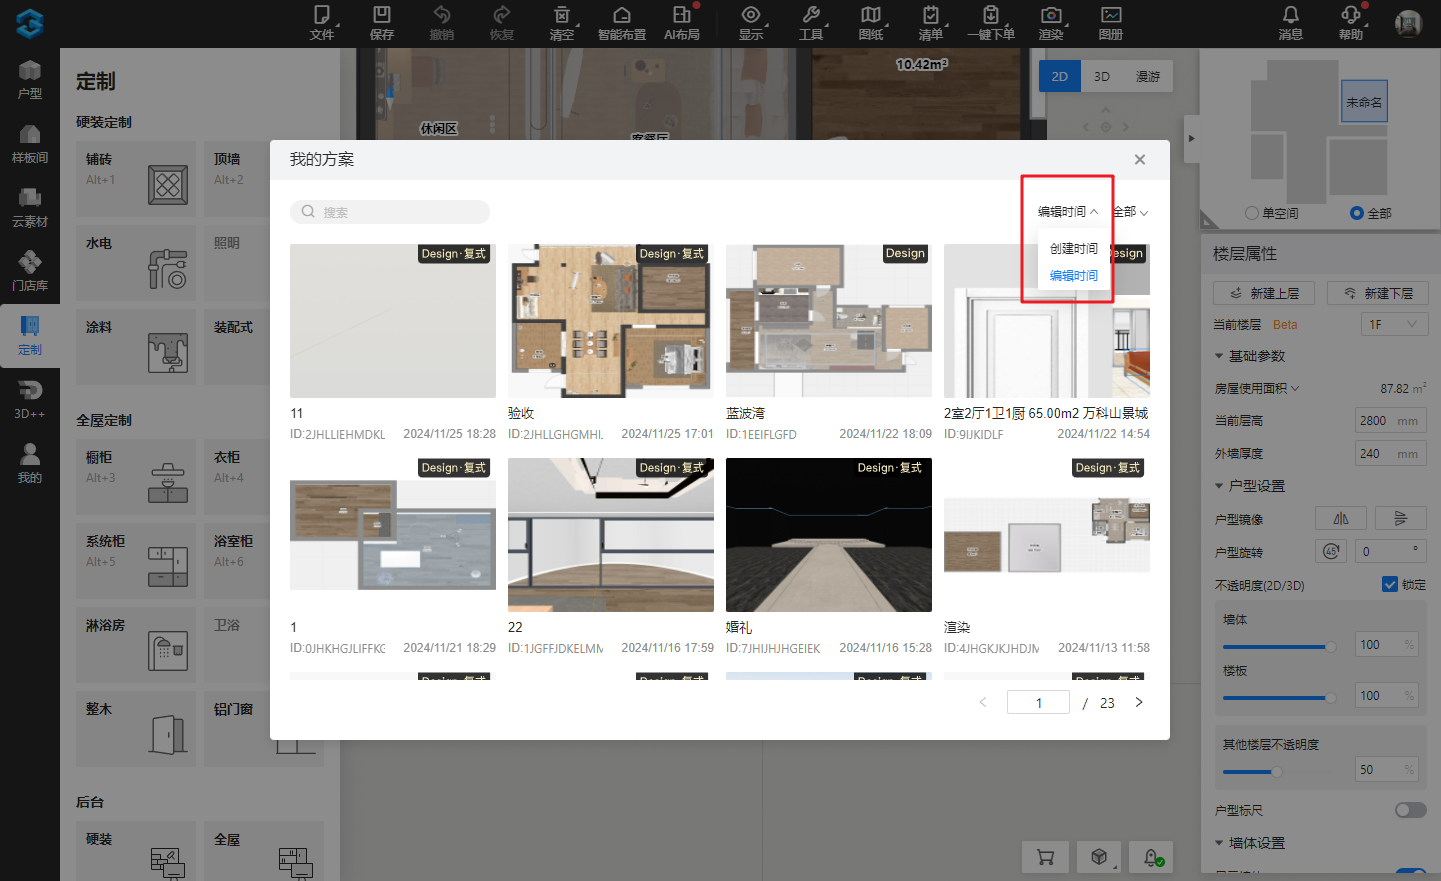
How It Works:
-
The default sorting order of "My Projects" is now based on last edited time instead of creation time.
-
When reopening "My Projects", the sorting order remains set to last edited time.
9. Optimized 2D View Display
Key Benefits:
-
Enhanced visual representation in 2D view for better clarity.

Improvements:
-
Ceiling layers are now semi-transparent, allowing visibility of objects underneath.
-
Baseboards and crown moldings are now displayed for a more realistic view.
How It Works:
-
Click "2D View" to see the updated visuals.
02 | Full-House Customization Updates
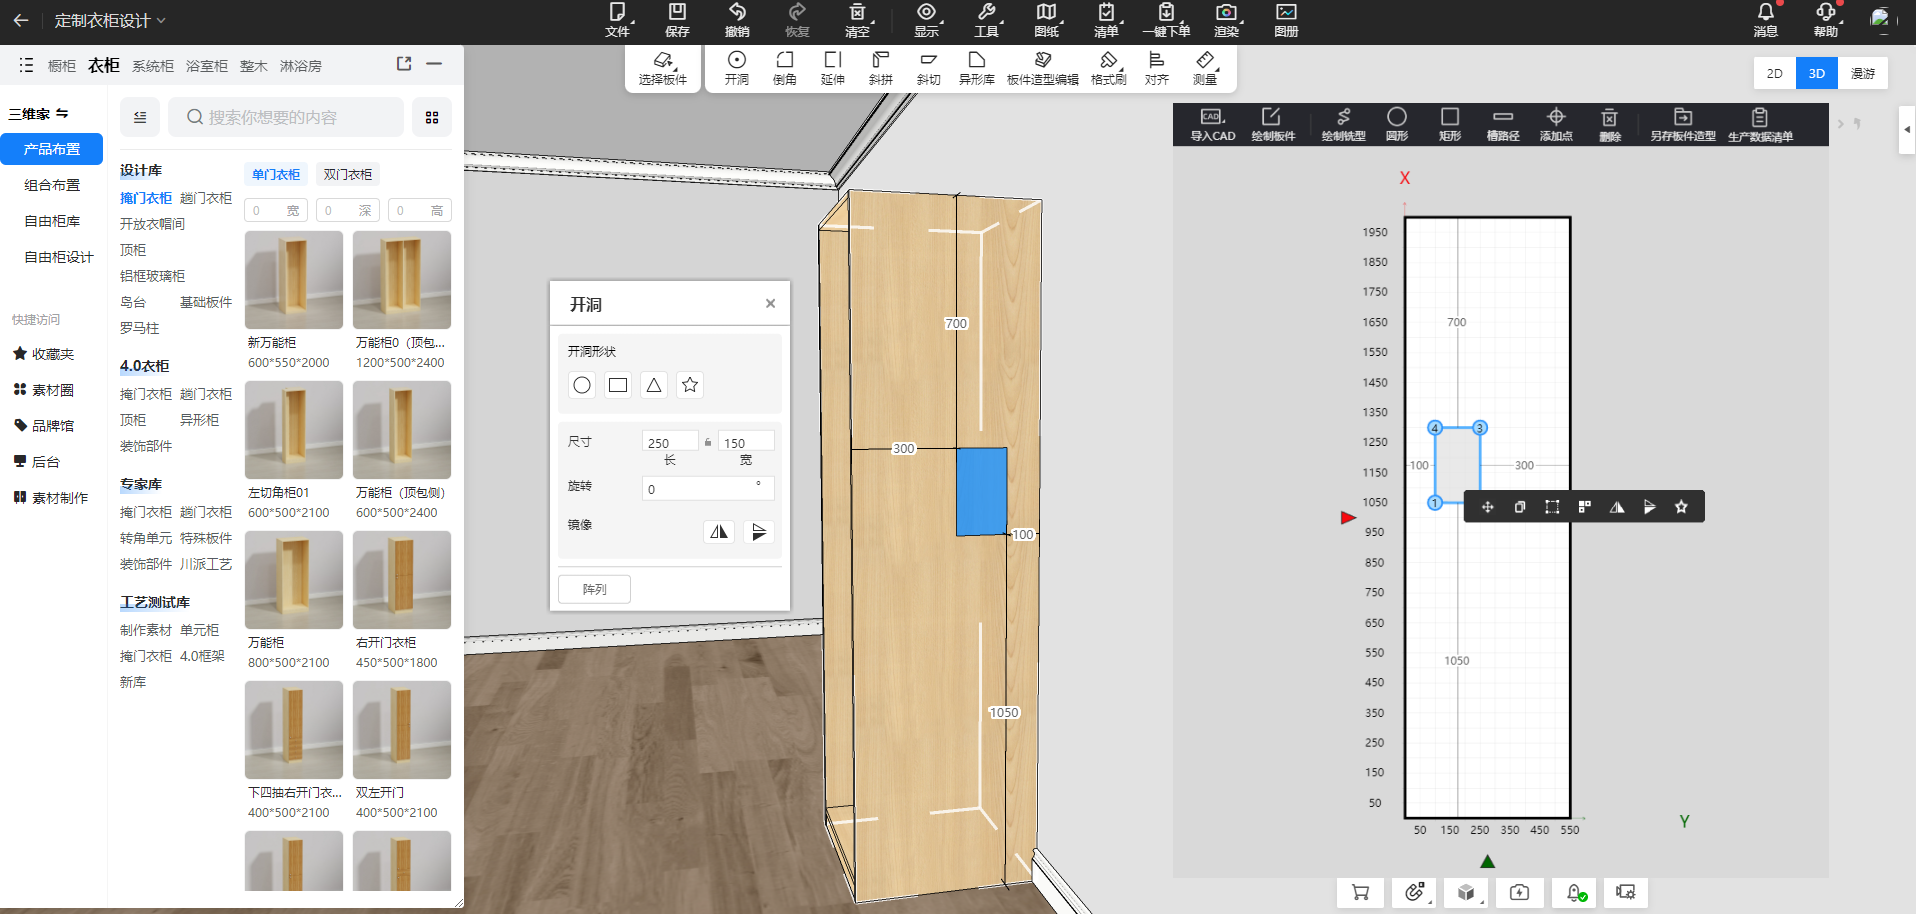
1. Panel Editing – Added Distance Display & Editing for Edge Offsets
Key Benefits:
-
Enhanced precision in panel hole-cutting operations.
-
Users can now view and edit the top and right edge distances in both 2D and 3D views.
Problem Solved:
-
Previously, when cutting holes in panels, there was no displayed distance for the right and top edges, making it difficult to adjust accurately.
-
Now, users can directly edit the right-side distance instead of adjusting from the left side only.
Before:

After:
2. Custom Cabinet Measurement – Added Customizable Shortcut Key for Measuring Two Panels
Key Benefits:
-
Users can set custom shortcut keys for cabinet panel measurement.
Problem Solved:
-
Previously, users had to manually navigate to the measurement tool, slowing down the design process.
-
Now, they can assign a shortcut key for quick access to panel measurement mode.

3. Custom Cabinet Material Management – Modular Display for Assets
Key Benefits:
-
Asset management display is now divided into modules, allowing for better organization.
Problem Solved:
-
Previously, all cabinet assets were displayed in a single list, making it time-consuming to find specific items.
-
Now, assets are categorized into modules, making it easier to locate relevant materials.
Before:
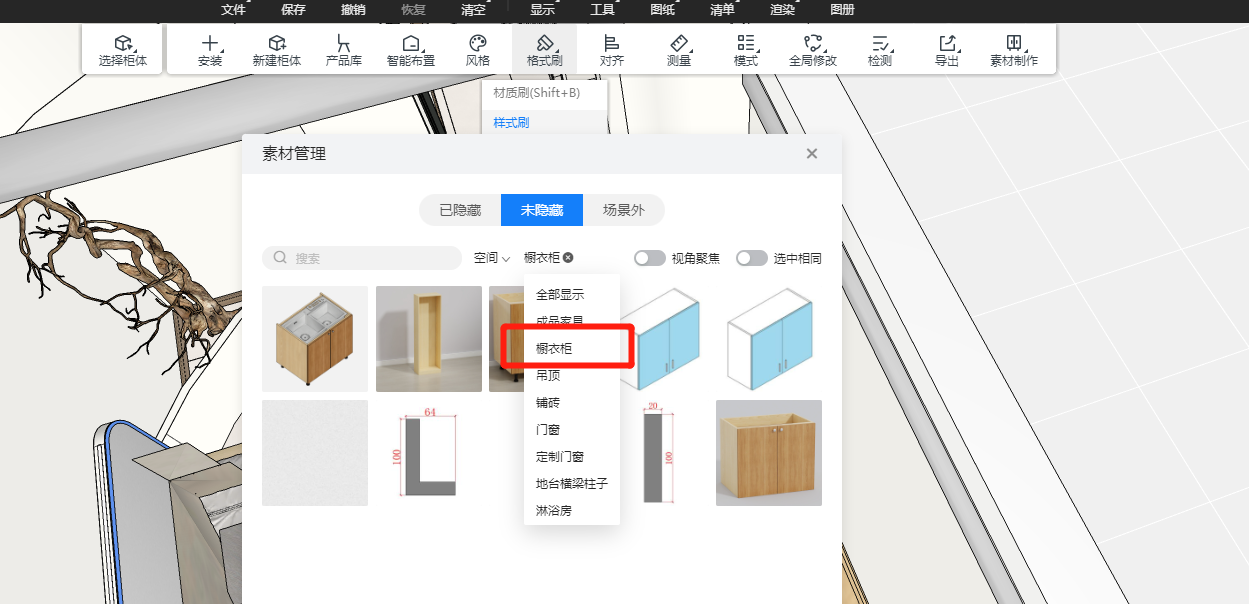
After: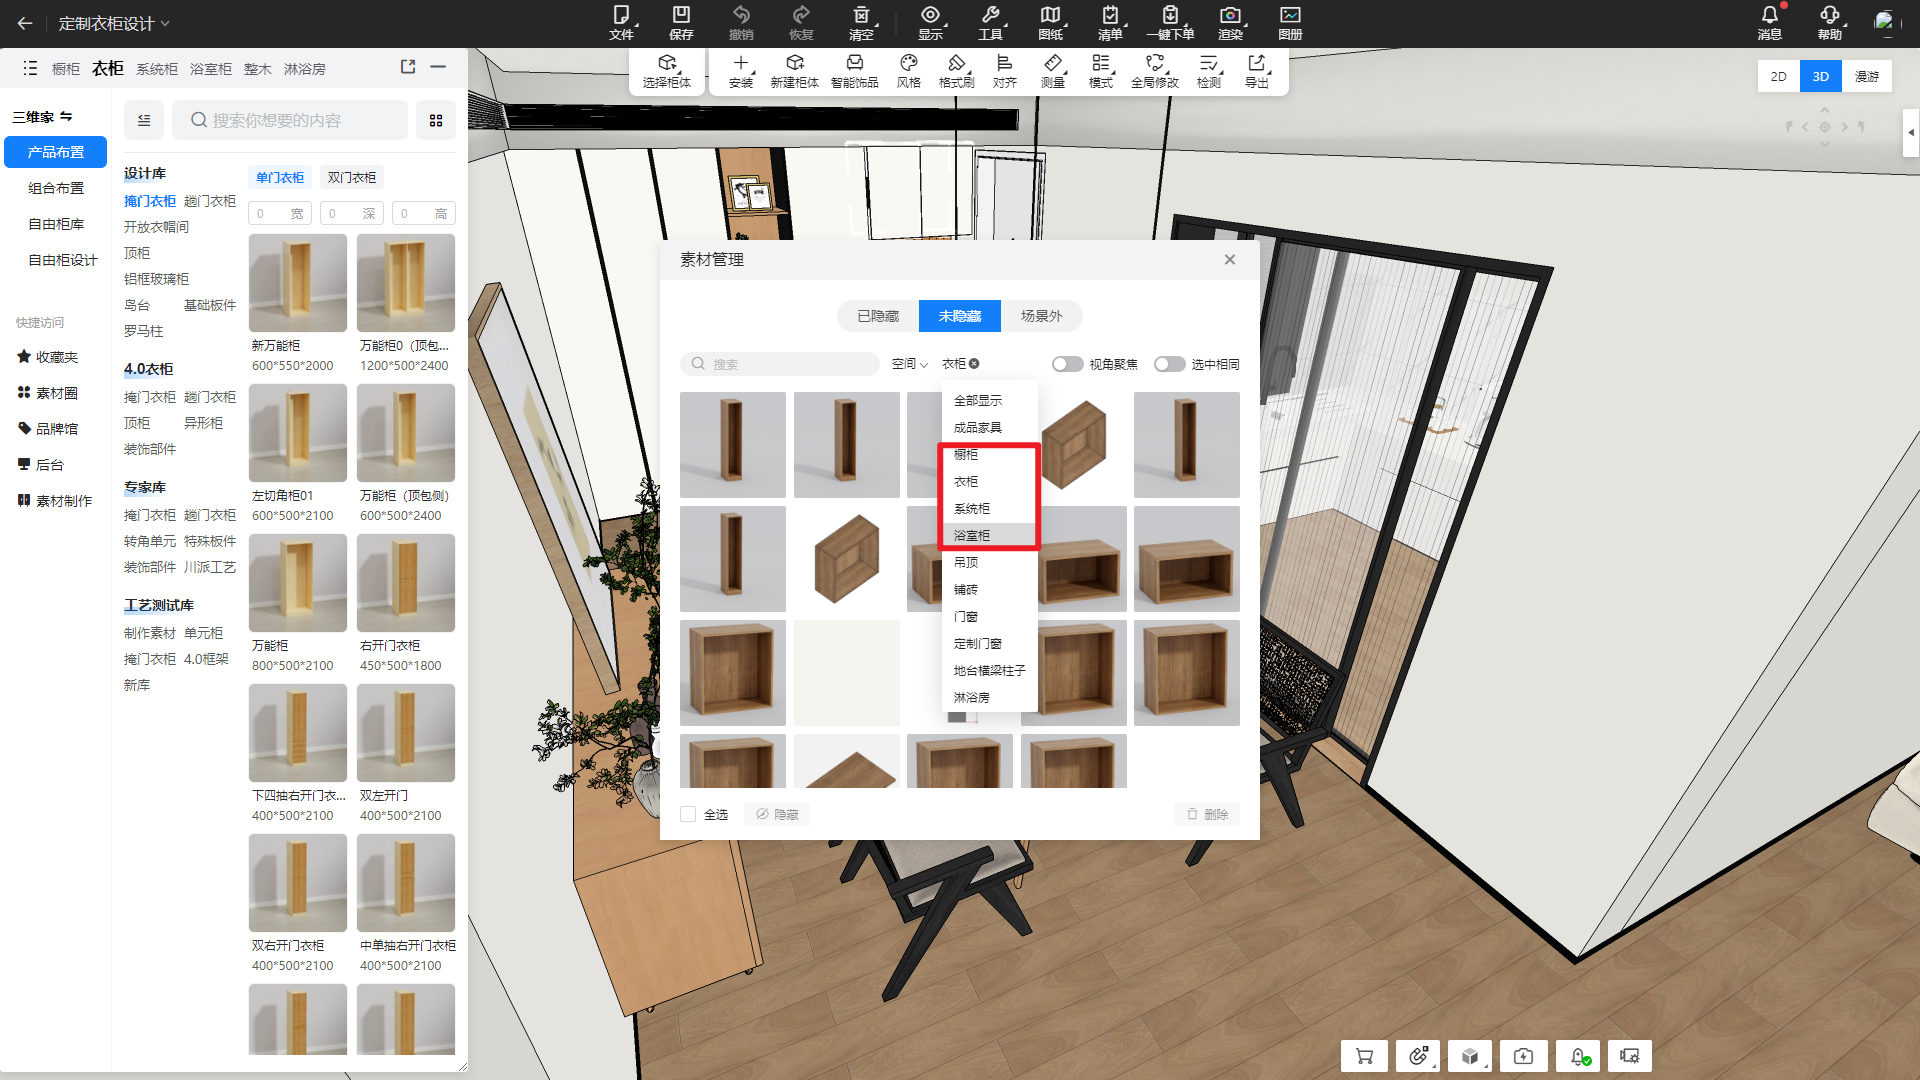
6. Hardware Hole Positioning - Set Hole Position from Panel Edge (Only available in AiHouse Advanced)
Feature Highlights
Allows users to configure whether hardware holes should be positioned along the panel edge based on manufacturing requirements.
Problem Solved
Due to manufacturing constraints, gaps must be maintained between panels. Currently, in 3D assembly, hardware positioning calculates hole depth based on the equal division of the gap between contact surfaces. This leads to inaccuracies in the required hole depth.
Feature Value
-
Reduces post-sale issues caused by incorrect hole depths.
-
Enhances accuracy in hole positioning and depth calculations.
Before: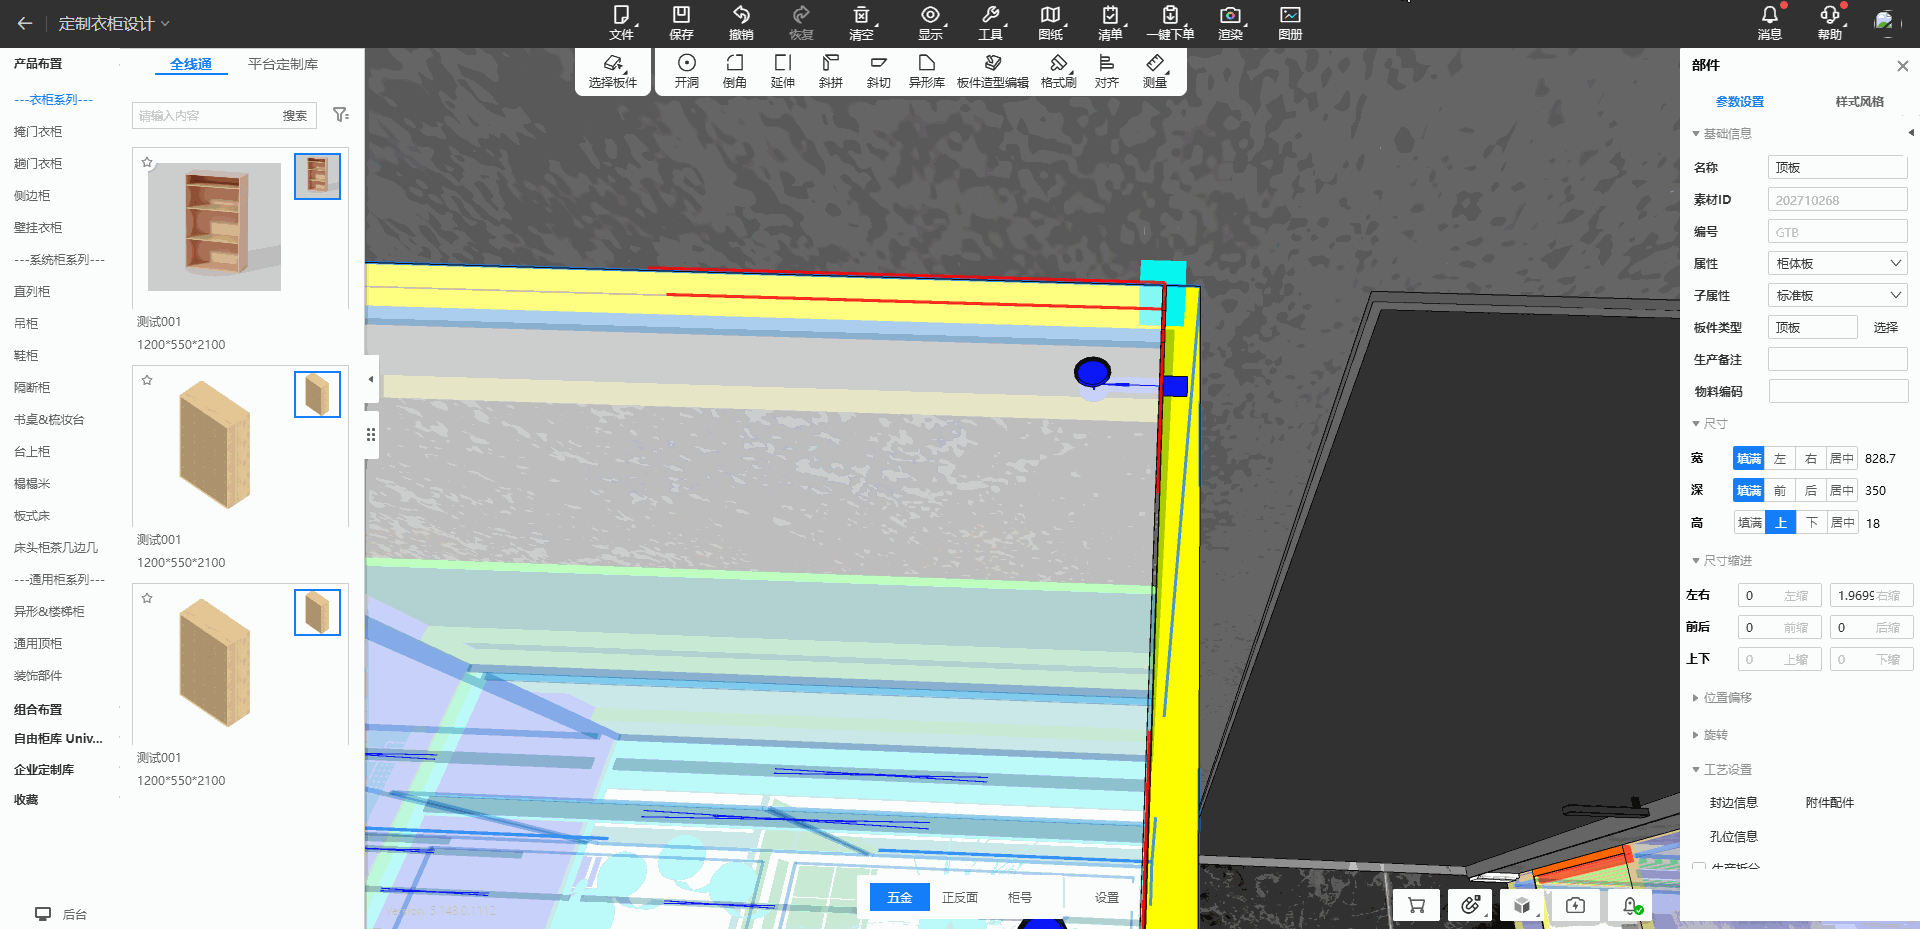
After:

Frontend Operation Steps
-
Right-click to install hardware.
Backend Configuration Steps
-
Go to 3D Production Configuration → Hardware Template Storage Configuration.
-
Navigate to Hardware Components → Structural Hardware, then select Two-in-One Connectors / Three-in-One Connectors / Adjustable Shelf Pins / Wooden Dowels.
-
Check the option Drill Hole from Panel Edge.

III. Aluminum Door and Window Features Collection
1. Series Replacement and Series Refresh
Feature Highlights
-
Allows quick series replacement in the frontend.
-
Supports retrieving the latest series configuration data.
Problem Solved
Previously, replacing a window series required deleting and redrawing the design. Now, users can select the desired window type and directly replace the series through the right-side property panel. Additionally, if the backend series data is updated, users can refresh the configuration with a single click.
Feature Value
-
Improves efficiency in cross-series replacements.
-
Enables users to copy designs and switch between series seamlessly.
-
Allows direct upgrades of window types in historical designs via the Series Refresh button.
2. 2D Mode - New Door and Window Library
Feature Highlights
-
The 2D Mode now includes a Door and Window Library, enabling quick generation of custom window types.
-
Generated elements can be directly edited on the canvas, shortening the design process.
Problem Solved
Previously, the 2D canvas only supported freehand drawing, and users could not utilize pre-configured door and window data. Now, the integration between the Cloud Design platform and the 2D App allows users to drag and drop door and window assets for immediate use.
Feature Value
-
Enhances design efficiency by enabling cross-canvas use of door and window assets.
-
Allows generated doors and windows to be edited and optimized, significantly reducing operation time.

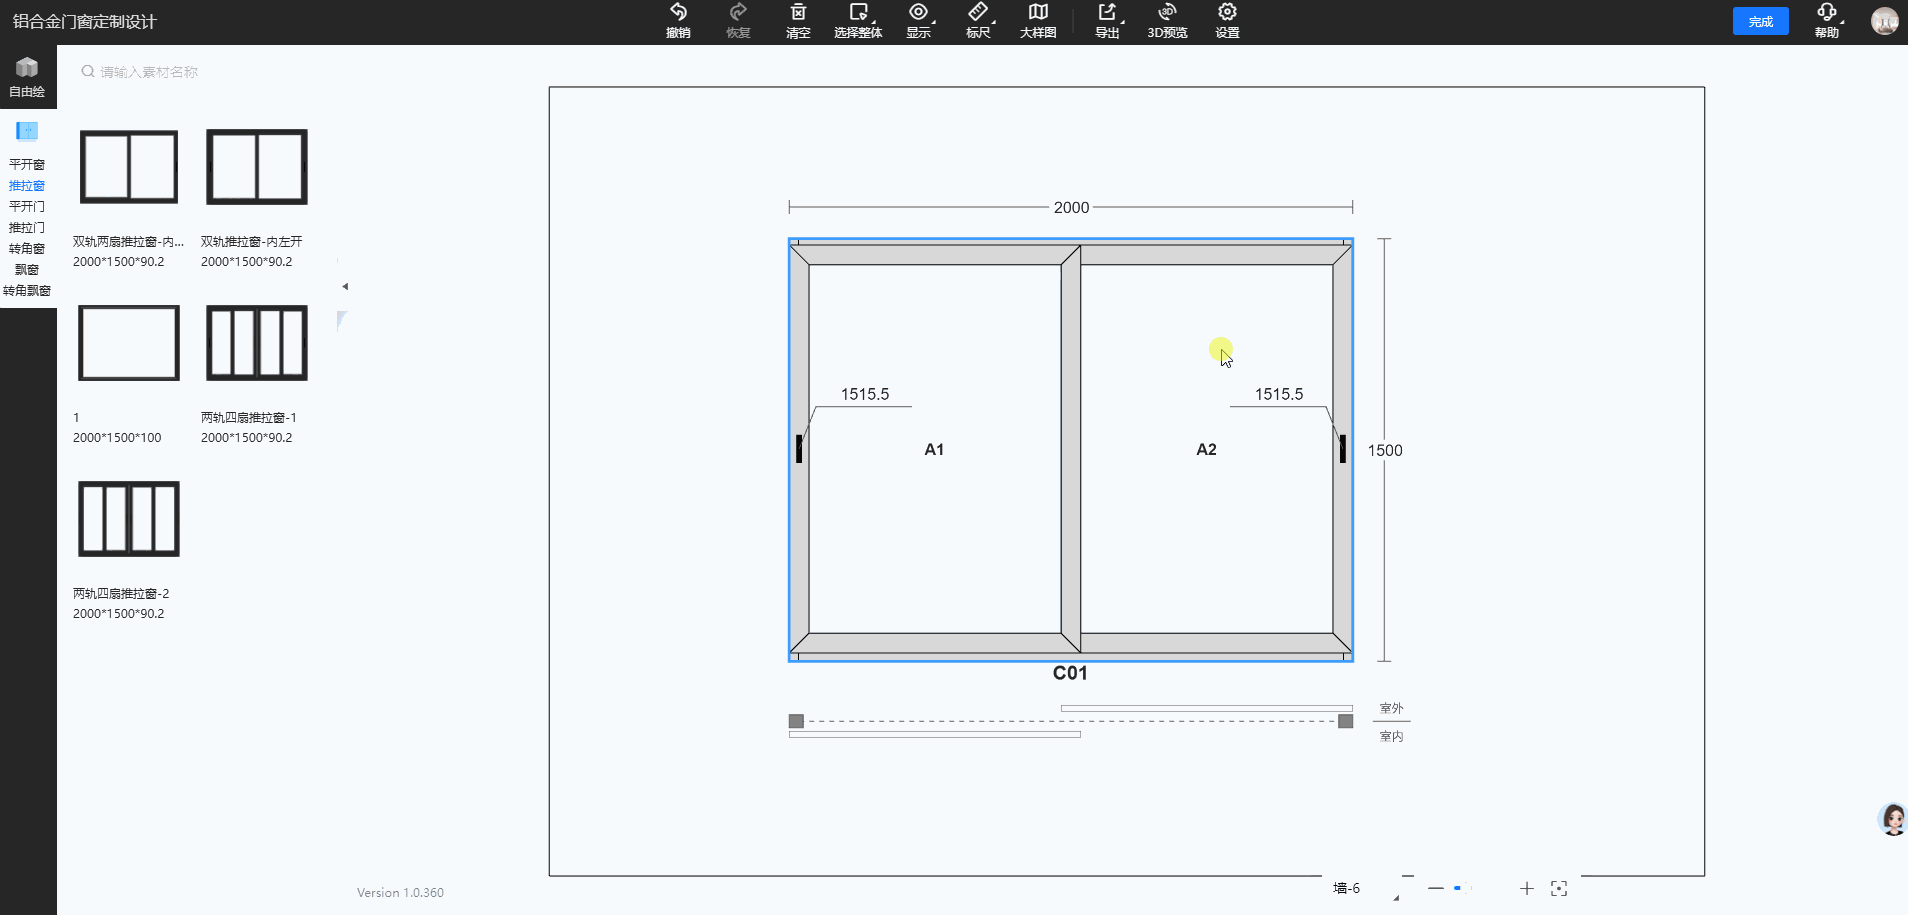
3. Three-Track Sliding Door Model Optimization
Feature Highlights
-
Optimizes the positioning of the movable panels in three-track sliding door models.
-
More accurately restores the real sliding door effect.
Problem Solved
Previously, the movable panels in three-track sliding doors would overlap incorrectly.
Feature Value
-
Improves the accuracy of door and window model data.
-
Ensures a one-to-one representation of real sliding doors.
-
Provides a what-you-see-is-what-you-get (WYSIWYG) experience.

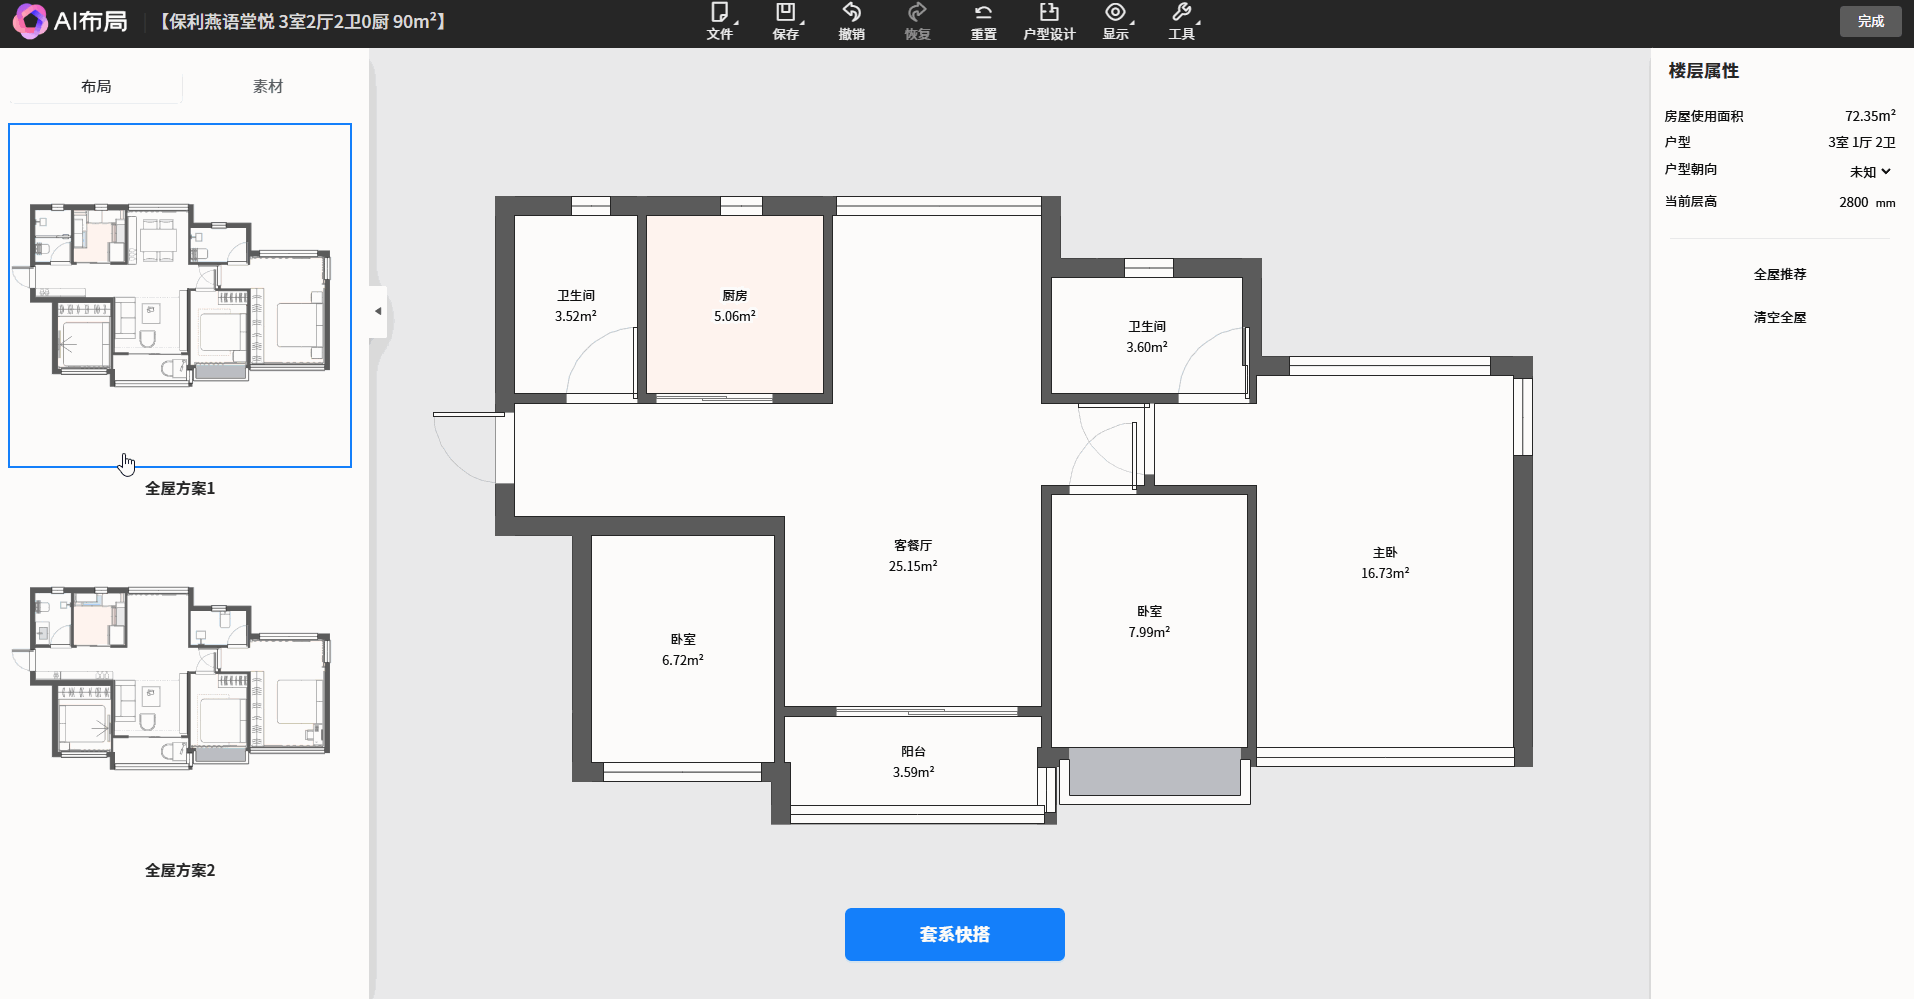
IV. AI Layout
1. Kitchen Layout Scoring System
Feature Highlights
-
Enhances the design process by evaluating and optimizing kitchen layouts based on scoring criteria.
-
Helps users better understand design solutions and quickly grasp key layout elements.
Problem Solved
Clients often struggle to understand complex design concepts and lack clear evaluation criteria for comparing different layout options.
Feature Value
-
Provides a clear decision-making reference by displaying storage and workflow scores.
-
Helps designers explain layouts effectively during client discussions, boosting professionalism.
-
Improves persuasion by offering clear scoring metrics for storage and movement efficiency.

Operation Steps
-
Enter AI Design, import a floor plan, and apply a layout plan.
-
Select the kitchen space and hover over the star icon in the left-side layout panel to view the scoring details.
2. Layout Zoning & Open Kitchen Design
Feature Highlights
-
Introduces layout zoning, allowing users to freely define layout areas for maximum space utilization.
-
Supports open kitchen designs for better spatial connectivity.
Problem Solved
Previously, users couldn't customize layout zoning freely and were constrained by traditional kitchen layouts.
Feature Value
-
Improves layout accuracy—zoning helps the system better identify different area types and generate optimized layout plans.
-
Maximizes space efficiency—minimizes wasted space.
-
Enhances spatial interaction—open kitchen layouts improve connectivity with dining and living areas, enhance lighting, and optimize ventilation.


Operation Steps
-
Enter AI Layout Design and select a space to zone.
-
Click the "Zoning Edit" dropdown in the right-side properties panel.
-
Choose a zoning type, then drag and draw the area.
-
Apply layout plans suggested on the left panel.
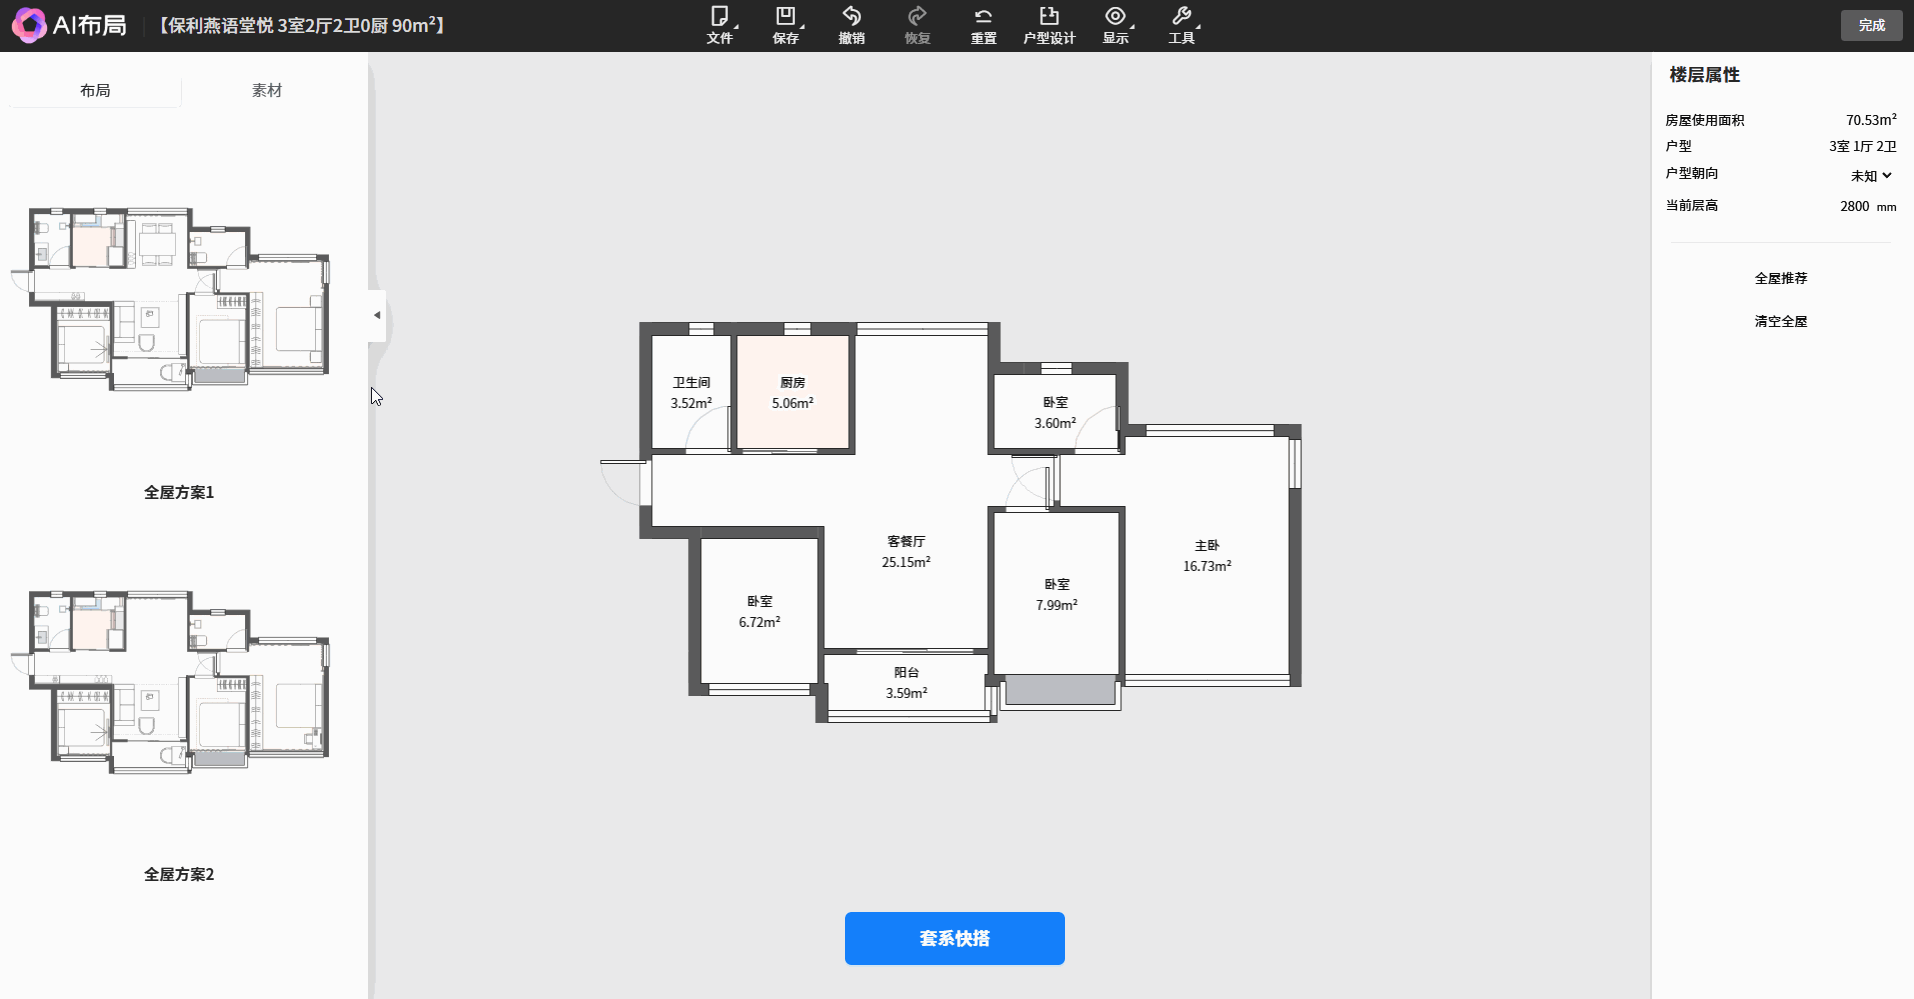
3. Optimized Bedroom Layouts
Feature Highlights
-
Enhances support for irregularly shaped rooms, improving adaptability and precision in bedroom layouts.
Problem Solved
Irregular room shapes made it difficult to position furniture efficiently, leading to wasted space.
Feature Value
-
Increases space utilization and reduces manual adjustments in complex layouts.

Operation Steps
-
Enter AI Layout Design, import a floor plan.
-
Select a bedroom, and the system will automatically generate multiple layout options.
-
Choose and apply a layout plan.
4. Measuring Tool
Feature Highlights
-
Adds a manual measuring tool for measuring distances between elements.
-
Introduces an automatic ruler, which displays distances between objects when hovering over them.
Problem Solved
-
Previously, there was no precise measurement tool, making furniture placement difficult and leading to poor space planning.
Feature Value
-
Enhances visualization and communication in design discussions.
-
Improves space planning by ensuring correct furniture sizing.
-
Increases efficiency by eliminating manual distance estimations.
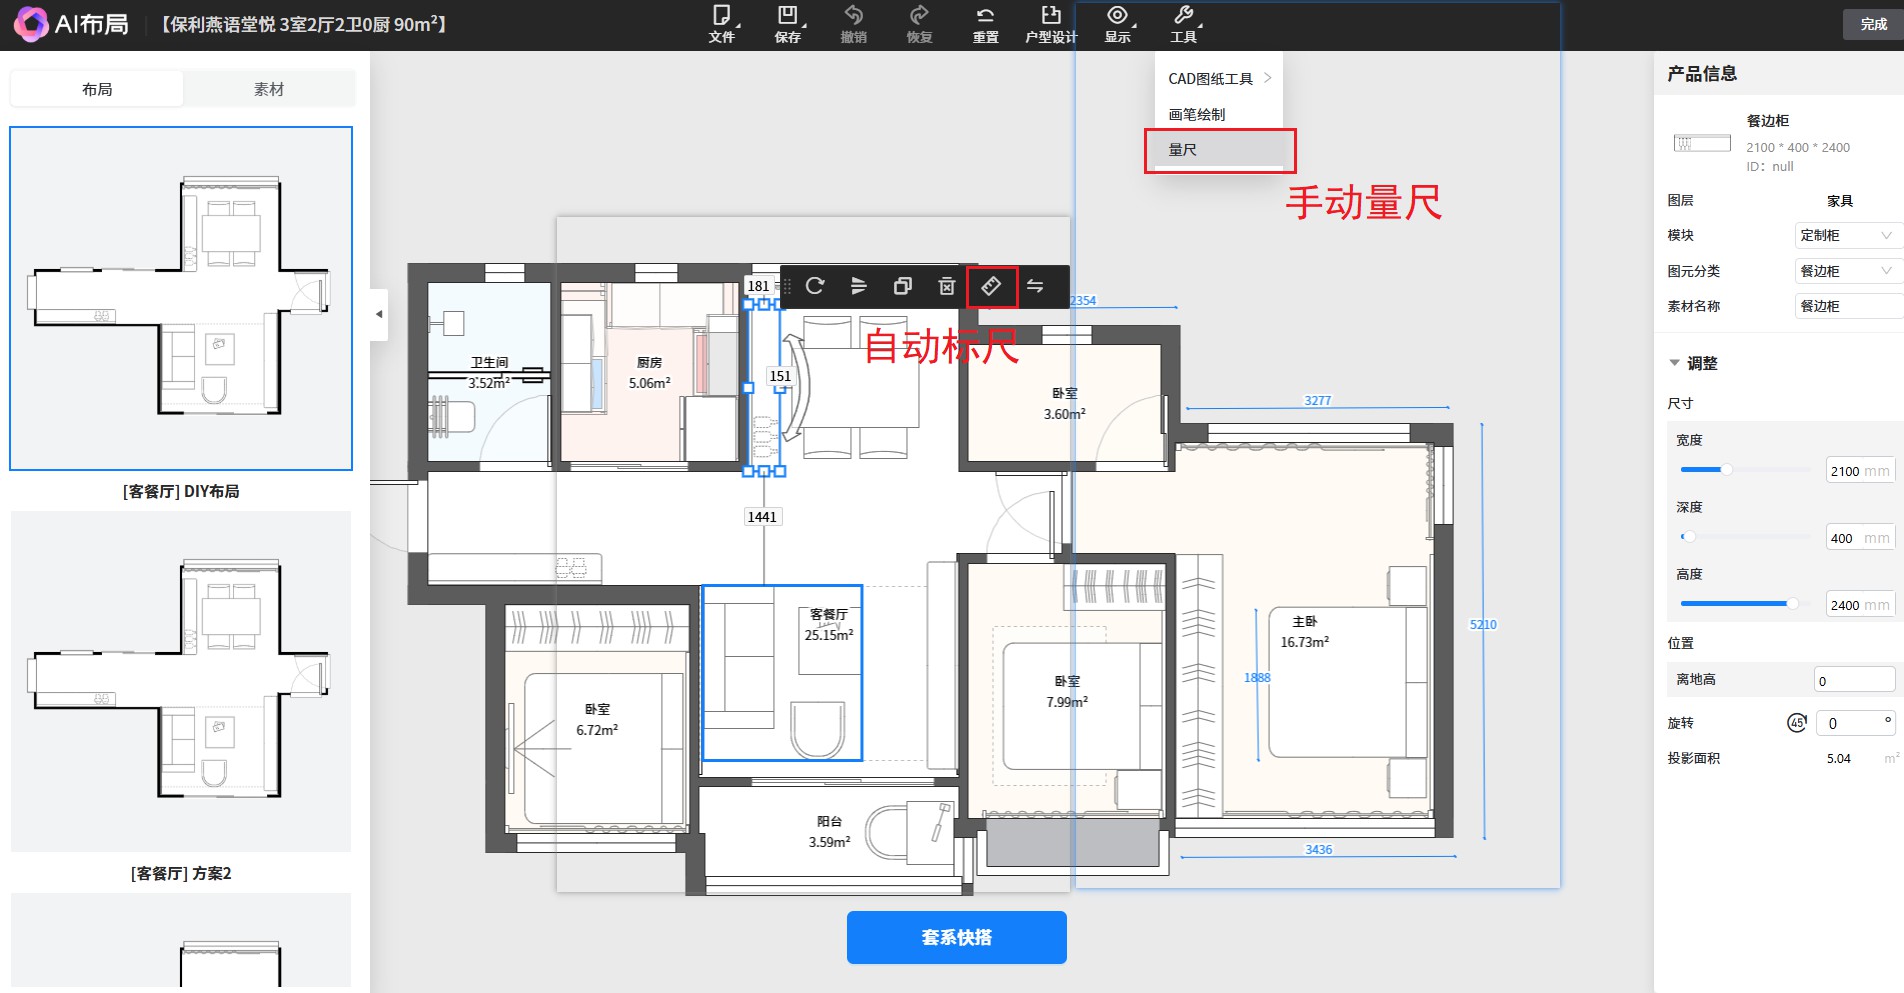
Operation Steps
-
Enter AI Layout Design, import a floor plan.
-
Manual Measurement: Click Tools in the top menu and select Measuring Tool.
-
Automatic Ruler: Select a furniture item, then click the ruler icon to activate automatic measurements.
5. Bathroom Layout Scoring System
Feature Highlights
-
Evaluates and optimizes bathroom layouts based on scoring criteria.
-
Helps designers quickly understand key layout factors.
Problem Solved
Clients often find it difficult to assess and compare different bathroom layout options due to a lack of clear evaluation criteria.
Feature Value
-
Provides a clear decision-making reference by displaying storage and workflow scores.
-
Boosts professionalism—structured scoring enhances designer credibility.

Operation Steps
-
Enter AI Design, import a floor plan, and apply a layout plan.
-
Select the bathroom space and hover over the star icon in the left-side layout panel to view the scoring details.
6. Optimized 3D Preview
Feature Highlights
-
Enhanced 3D walkthrough effects.
-
After applying a design set, users can generate a 3D preview instantly.
-
Improved visual quality, offering a clearer and more detailed representation of home layouts.
Problem Solved
Previously, users had to wait for 3D previews to generate, slowing down the workflow.
Feature Value
-
Improves user experience by reducing wait time.
-
Enhances real-time preview capabilities, increasing user engagement and satisfaction.
Operation Steps
-
Enter AI Design, import a floor plan, and apply a layout plan.
-
Click Tools → Quick 3D Preview / 3D Walkthrough Preview to view the real-time layout effect.
Excited to Try These New AiHouse Features?
Log into your account now and start exploring the latest updates!